
Overview
A shooting program is a structured framework designed for organizing and conducting shooting events, whether they are for training, competition, or recreational purposes. It encompasses a series of predefined exercises or series, each with specific parameters like shooting positions, time limits, and scoring methods. The creation and management of a shooting program involve setting up various elements such as series names, shot counts, class groups, and scoring rules, which are tailored to the skill levels and objectives of the participants.
Using an interface, you can create new shooting programs, edit existing ones, or view them in a read-only format. The process includes defining class-specific settings, customizing series with names and time allocations, and integrating results with management software like Leon. Additionally, the program allows for the management of shooting times, including countdowns and block-times, and offers flexibility in scoring with options for manual, open, or closed marking.
Essentially, a shooting program serves as a comprehensive guide and tool for efficiently running shooting events, ensuring that they are conducted smoothly, fairly, and in alignment with the intended goals and standards of the shooting discipline.
Notably, a shooting program can function both as a standalone system on shooters’ monitors and in conjunction with eControl, which is utilized by the Chief Range Officer (CRO) to operate multiple targets simultaneously. This dual functionality makes it suitable for a wide range of shooting events and scenarios. It ensures efficient running of events, maintaining fairness and adherence to the desired standards of the shooting discipline.
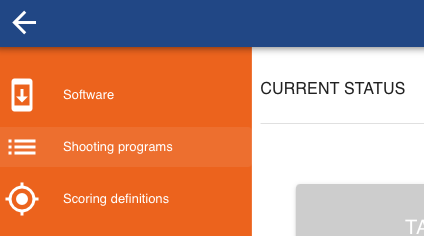
The shooting program / course of fire is currently available under System Update → Shooting programs
Here you will see a list of all available shooting programs.

Create
To initiate the creation of a new shooting program, begin by locating the "+ CREATE NEW SHOOTING PROGRAM" button at the top of your interface.
General

The first page of the wizard is designed to streamline your setup process. Here, you will be prompted to enter various parameters that define the core aspects of your shooting program. Your selections on this page will simplify subsequent steps by applying common parameters consistently across multiple series if needed.
Name
It's important to provide a descriptive and unique name for your shooting program to ensure easy identification and retrieval in the future.
Organization
Choose the appropriate organization under which your shooting program will be categorized. This helps in better organizing and grouping your programs for easy retrieval and management.
Multi-target
Whether this program uses multiple targets (e.g., ISSF rapid fire pistol)
Scale
If you are using a target scoring definition at a distance other than what it was designed for (e.g., training indoors at 15 meters with a 250-meter target), you can scale it according to your needs to get a correct percentage
Leon integration
Decide whether to integrate this shooting program with the Leon result management software.
Shooting position
Determine if your program will involve multiple shooting positions.
Spectator marking
This option allows you to set open marking for all series in your shooting program. If you choose 'Yes' for open marking, this feature will be enabled automatically across all series. However, if you select 'No', you gain the flexibility to specify open marking settings individually for each series.
Reshooting rules
Here, you have the option to specify if reshooting is allowed and, if so, define the specific rules that govern it. This ensures clarity and fairness in situations where reshooting may be necessary.
Reshooting procedure profile
This setting determines how reshooting is executed. For most programs, this should be set to “none”, but in special cases—such as certain ISSF pistol programs—it must be set to “wait after time block”. This is because the reshoot executes at the same time as a normal series.
Class groups
Class Groups allow for the customization of your shooting program to accommodate the unique needs of different shooter classifications. These settings can be applied specifically to:
Series Names
Class Groups provide a versatile tool for personalizing series names based on the characteristics of different shooter classes.
For example, you might use shooting positions as a basis for naming your series, assigning names like "Prone Series" or "Standing Series". This method of naming helps in clearly differentiating the series, making it easier for participants to identify their respective challenges and for organizers to manage the event.
However, it's important to note that the use of shooting positions for series naming is just one possible application of Class Groups. The real power of this feature lies in its adaptability, allowing you to tailor series names based on any relevant class-specific criteria, such as the type of firearm, age group, or experience level. This level of customization ensures that each series within your shooting program accurately represents and caters to the unique aspects of each class.
Shooting Time
Class Groups enable the customization of shooting times to suit the varying requirements of different classes. This feature allows you to assign a specific amount of time for each class, aligning with their skill levels and the demands of their shooting positions.
When you define these time settings within Class Groups, the system takes over to automatically assign the correct shooting time for each lane or individual shooter, based on the class they belong to.
Class groups
If you select Class groups in the General page, you will see the Class group page here.
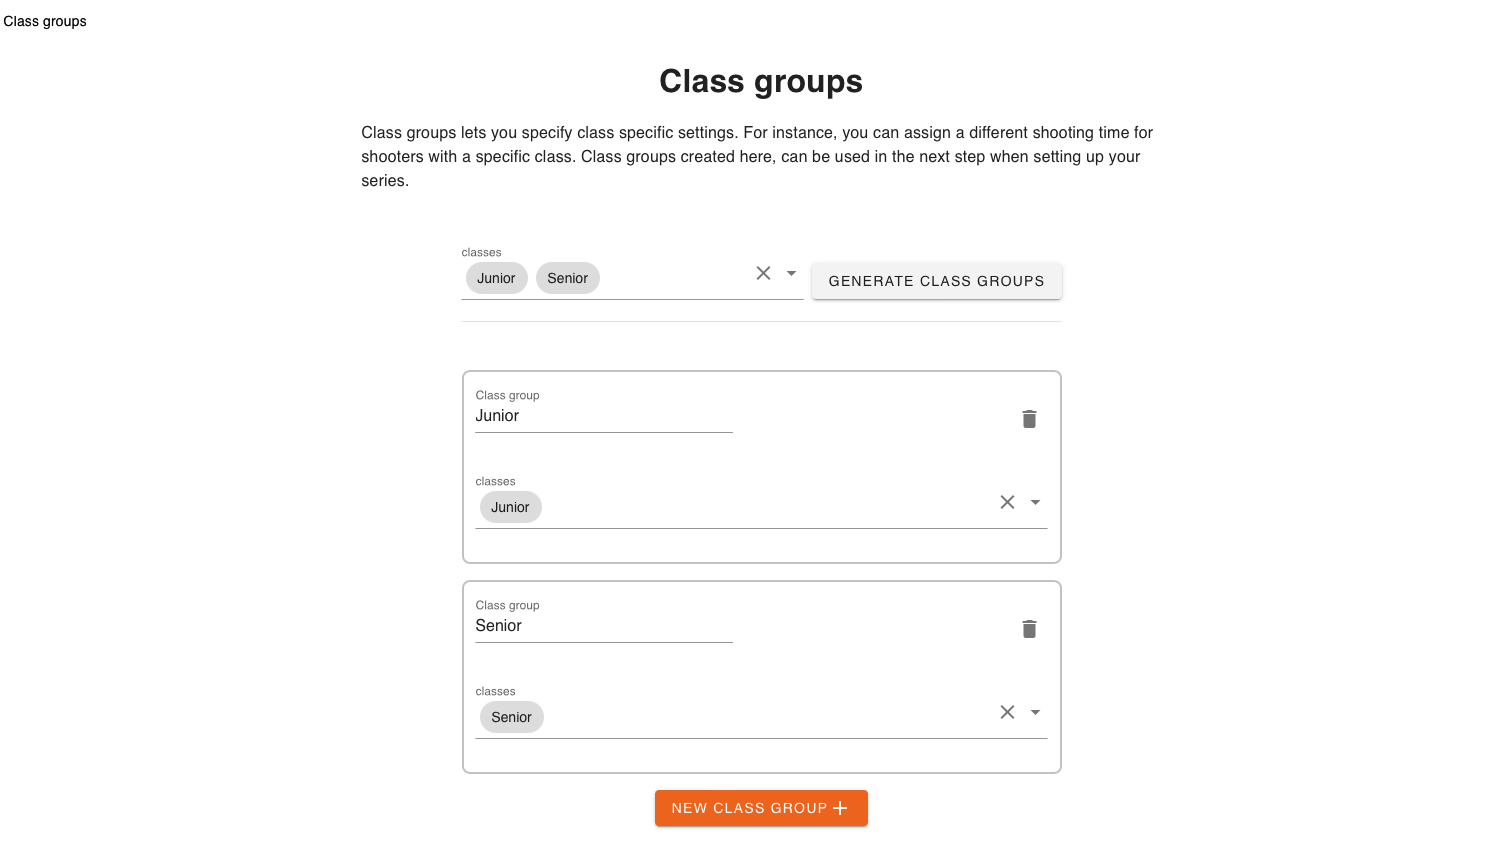
Generate class groups
In the 'Classes' dropdown, you are provided with the functionality to select from a list of existing classes or to input new ones for inclusion in your program. It's essential to use consistent naming for these classes, matching them precisely with the names used in the pre-squadding phase to ensure smooth coordination.
Furthermore, by clicking the "Generate Class Group" button, the system will automatically create class groups for all the classes you have selected or added.
New class group
Click to add a class group.
Series
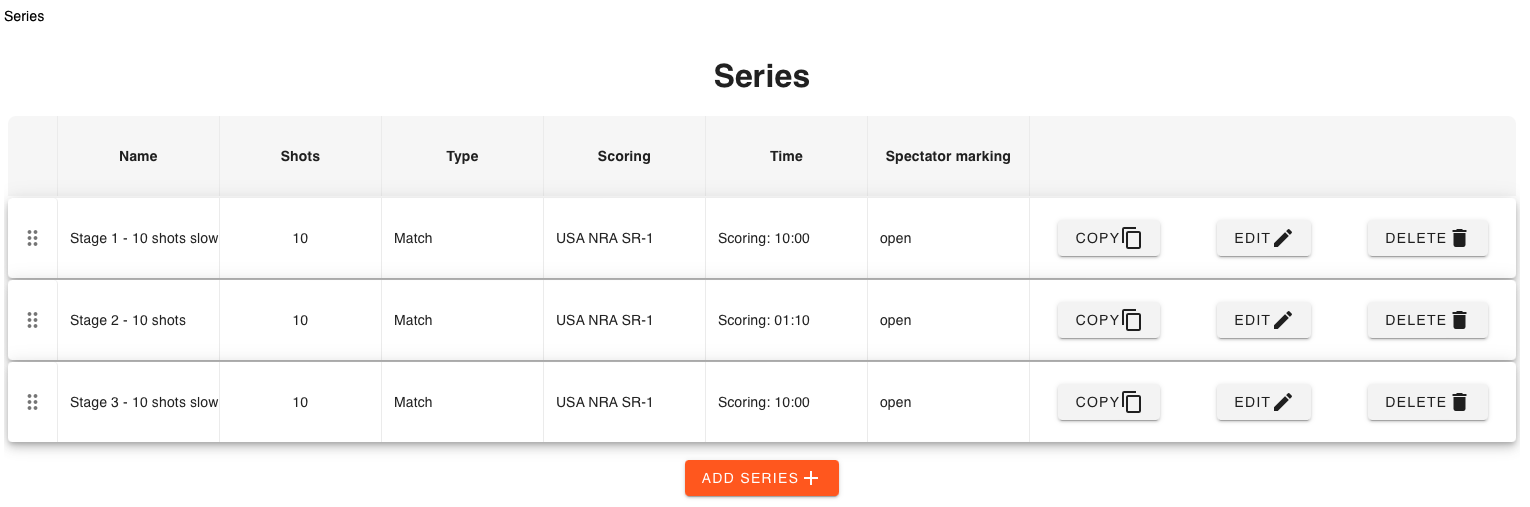
The Series Wizard page is a dynamic page for managing the series within your shooting program. On this page, you'll find a table displaying all your currently defined series, providing a quick overview of their respective settings.
This page offer a comprehensive overview of all settings for each series. It provides a way to understand the parameters of each series at a glance, ensuring you have quick access to the essential details needed for effective management and customization.
Additionally, the drag-and-drop feature on this page lets you rearrange the order of the series to suit the flow of your program. Simply, grab and drag the  indicator and release when in correct position.
Write your initial question/sentence to troubleshoot
When you click the "Add Series +" button, a new wizard opens up, guiding you through the process of creating a new series. This wizard walks you through each step, from naming the series to setting its specific parameters such as number of shots, type, scoring, and time. This step-by-step approach ensures that every aspect of the series is tailored to fit seamlessly into your shooting program.
General
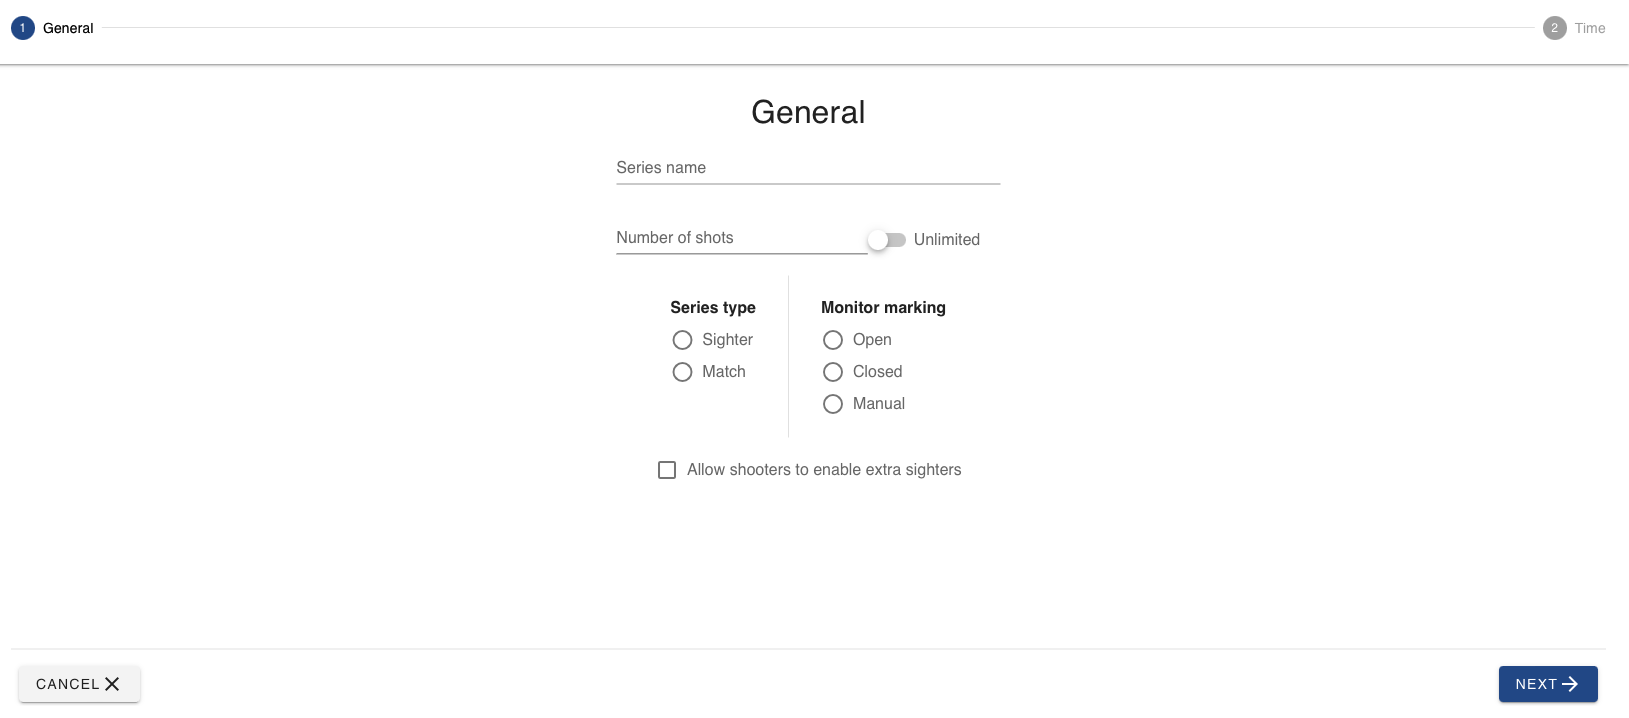
Series name
Assign a distinct name to each series, with the option to use class groups for customization.
Use class group to set class-specific series names?
Click to add a class group.![]()
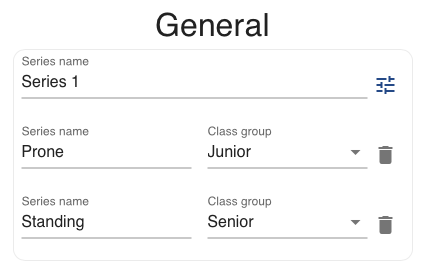
Adding class group allows you to create names that reflect e.g. the class-specific shooting positions or skill levels, such as "Prone series" or “Standing series”.
Series name will be the default if no class matches the class group.
Number of shots
Determine the number of shots for each series. Toggle to allow unlimited amount of shots.
Series type
Sighters
This option is designed for shooters to fine-tune their equipment, particularly scopes, before the official scoring begins. Sighters serve as a practice or warm-up round, allowing shooters to make necessary adjustments and get accustomed to the shooting conditions.
Match
Choosing 'Match' indicates that the series is for official scoring. The shots fired in these series are recorded and contribute to the shooter's total score.
Monitor marking
The monitor marking feature offers three distinct modes: open, closed, or manual, each catering to different visibility levels for shooters and officials.
Open
In this mode, shooters can view their shots in real-time, as soon as they are fired. This immediate feedback allows participants to adjust their technique and approach on the fly.
Closed
With closed marking, the visibility of shots is delayed. Shooters will only see their shots after completing the series and once the chief range officer (CRO) issues the marking command. In this mode, shots are revealed one at a time, at intervals of 2 seconds.
Manual
Manual marking is a mode where the chief range officer (CRO) plays a direct role in the scoring process. Each shot is marked individually by the CRO, who must actively click a button to record each shot. This method is particularly favored in final rounds or events where a speaker is present, as it adds an element of suspense and excitement to the marking process.
This approach to scoring is often used to heighten the experience for both shooters and spectators. By manually marking each shot, the CRO can synchronize the announcement of scores with the speaker's commentary, creating a more dynamic and engaging atmosphere. This method not only keeps the audience captivated but also adds an additional layer of intensity for the competitors, making for a thrilling conclusion to competitions.
Time

Normal time
Define time manually for this series.
block time
The block time feature, when activated, does not create an additional time period but rather requires the current series to be completed within the scoring time established in the previous series.
This feature is particularly useful in scenarios where sighters and match series are intended to operate within the same time block. It allows shooters to seamlessly transition from sighters to match series at their own pace.
Light control
Light control is used for series governed by a red/green light sequence (e.g., ISSF Pistol events). In this mode, scoring time is calculated based on these sequences—for example, shooting at the first target during the first sequence, and moving to another target in the next.
Countdown
This is the time period before the actual start of a series. Countdown serves as a preparatory phase for the shooters, allowing them to ready themselves both mentally and physically before the commencement of the series. The countdown is displayed as a timer, providing a clear visual cue for the shooters to know exactly when the series will begin.
Once the countdown completes, the Shooting time begins.
Scoring
This is the allocated time frame within which the shooters must complete their nominal shot count. The shooting time is crucial as it adds an element of time-based skill and pressure to the competition. It requires shooters to not only be accurate but also efficient in their shooting. Managing this time effectively is key to a successful performance in the event.
In managing scoring time, the following points are key when considering shots fired outside the designated time:
The eControl system will indicate shots fired before or after the allocated time. However, these indications are primarily for the Chief Range Officer's (CRO) reference.
The decision of whether shots are valid, based on their timing, rests with the CRO. Despite what eControl displays, it's the CRO's call, based on firing commands, that determines if shots fall within the allotted timeframe.
All shots are initially included in the score. Should the CRO deem any shots invalid due to timing, they must be marked as discarded to exclude them from the final score.
This emphasizes the critical role of the CRO in enforcing timing rules and underscores the balance between technological assistance and human judgment in shooting events.
Use class group to set class-specific scoring or countdown time?
To add a class group, simply click the designated button![]() , select your desired class group, and then set the specific time for that class.
, select your desired class group, and then set the specific time for that class.
This process allows you to tailor the timing to the unique requirements of each class group in your program.

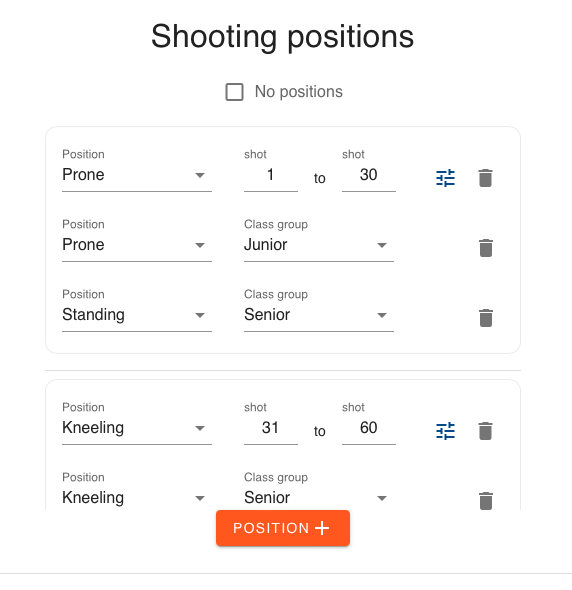
Position
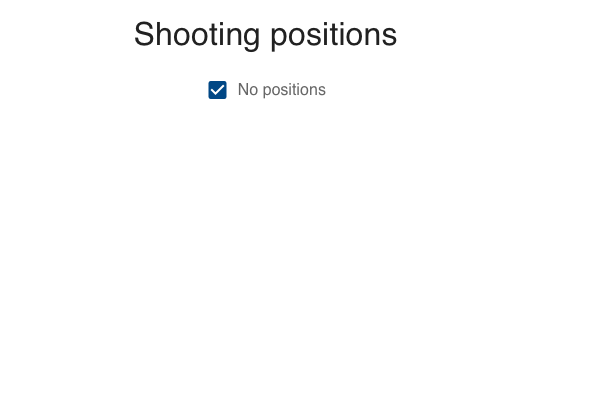
In the 'Shooting Position' page, you'll find the option to uncheck "No position" in order to set a specific shooting position for the series. When a shooting position is designated, and if your setup includes the use of a target lift system, this will automatically configure the target lift to adjust to the selected position before the start of the series.
Use class group to set class-specific shooting positions?
This process allows you to tailor the shooting position to the unique requirements of each class group in your program.
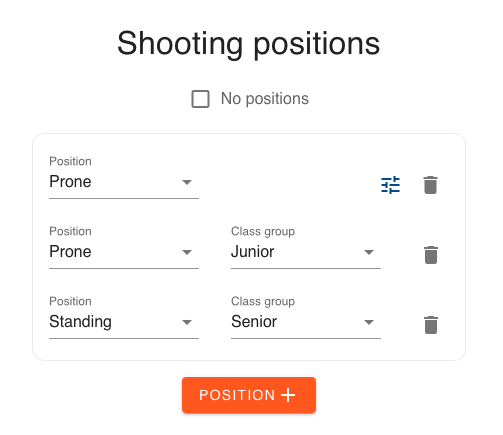
Are you using multiple positions for a class group?
When you add a shooting position, you have the ability to specify the shot range for that particular position. This setting enables the target lift system to transition the target to a different position as required, based on the range you’ve determined for each specific shooting stance.
Result integration
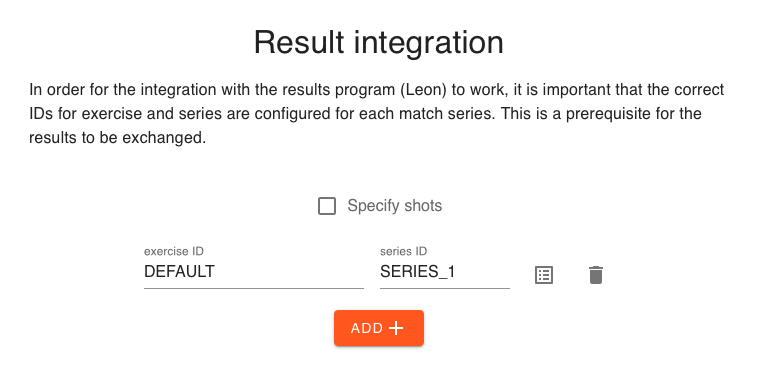
For seamless integration with the Leon ranking program, it's crucial to ensure that the correct IDs for both the exercise and each match series are accurately configured. Proper setup of these IDs is a fundamental requirement for the effective exchange and synchronization of results between the shooting program and the Leon system. This step is vital for maintaining accurate and consistent data across both platforms.
You will find a set of pre-defined IDs presented in checkboxes. Simply choose the relevant IDs from these options to ensure correct configuration.
When exporting competition results to Excel, the IDs chosen for exercises and match series will also be visible in the export file.
Duplicate an existing series quickly. This is particularly useful when you want to create a new series that closely mirrors the settings of an existing one, saving you time and effort in setup.
Remove a series that is no longer needed or relevant to your program.
Sums
The 'Sums' page features a dynamic layout akin to the series page, equipped with a table that lists all the defined sums. This table format provides an overview of each sum, making it easy to review and manage them. The columns in this table include:
Visible
Indicates whether the sum is visible in eControl, shot logs and the shooters monitor.
Name
The designated name for each sum.
Series
The specific series associated with each sum.
Ingoing sum
Shows if the sum includes previous totals.
Decimals
Details whether decimals are counted in the sum.
Inner Hits
Indicates if inner tens are included in the calculation.
You have the flexibility to rearrange the sums by using the drag-and-drop feature, allowing you to adjust their sequence as per your requirements.
Include time
You get a summary showing both your score and the total time taken from the start of the series up until the last shot
Add new sum
When you choose to add a new sum, a dialog box will appear, prompting you to fill in the following fields:
Name
Enter a unique name for the new sum
Series
Select from your previously defined series to count with this sum. It is possible to select shot range, so that you can create a sub series total. Like 1-10, 11-20, 21-30, 31-40 in a 40 shots series.
"Use Ingoing Sum"
If the sum includes previous totals.
"Count Decimals"
Whether decimals are counted in the sum.
"Count Inner Hits"
Indicates if inner hits are included in the calculation of the sum.
Managing sums
Each row representing a sum in the table is equipped with options to copy, edit, or delete, giving you complete control over the sums in your program. This feature ensures that you can tailor each sum to fit the specific needs and rules of your shooting event.
Copy
To duplicate an existing shooting program, simply click on the “copy” icon . Upon doing so, the system will automatically generate a new copy of the program. The naming convention for this copy will follow the original name, appended with "(copy)" to distinguish it from the original. This feature ensures a seamless and efficient way to replicate a shooting program while maintaining the integrity and structure of the original program.
Edit
To modify an existing shooting program, locate and click on the "edit" icon , which is represented by a pencil symbol next to the program you wish to change. Clicking this icon will open the editing wizard, which appears identical to the wizard used for creating a new shooting program. It is important to note that only the programs that you have personally created or copied can be edited.
In this editing mode, you can make the necessary adjustments to your program. You have the flexibility to change the name, adjust the number of shots, add, modify, remove or re-arrange any sereis, update the visual scoring definition or alter any other settings that define the shooting exercise.
Once you have entered the editing wizard, follow the prompts to navigate through the various configurable elements of the program. Make your desired changes with precision, ensuring that each modification serves the intended purpose of your program.
View
To view a shooting program, simply click the “eye” icon located next to the program you wish to review. This action will open the program in a read-only format, which is similar in layout and structure to the 'Add New' and 'Edit' sections, offering a familiar and user-friendly interface.
In this view mode, you can thoroughly examine all aspects of the shooting program, including series, sums, class groups, and other settings, but you will not be able to make any edits or changes.
This read-only mode is particularly useful for situations where you need to review or reference the details of a program without the risk of unintentional modifications. It ensures that the integrity of the program's settings and configurations is maintained while allowing full visibility into its structure and parameters. This mode is ideal for verification purposes, planning discussions, or sharing program details with others.
Delete
To delete a shooting program, locate the 'Delete' icon, represented by a trash can symbol , in the list of shooting programs. Clicking this icon will initiate the process to permanently remove the selected program from your system. This feature is straightforward and provides a quick way to manage and declutter your list of shooting programs, ensuring that only current and relevant programs are retained. Please exercise caution when using this feature, as deleting a program is irreversible and will result in the permanent loss of all associated data and settings.